

Ensuring the safety of your vehicle starts with understanding its braking system. The brake pads are a critical component that directly affects how effectively your vehicle can stop. Regularly check the condition of your brake pads to maintain optimal performance and prevent any potential accidents. This article will guide you through the process of inspecting and replacing brake pads, emphasizing the importance of safety and proper maintenance.
Brake pads undergo significant wear and tear over time, and ignoring their condition can lead to reduced braking efficiency and damage to the rotors. By regularly inspecting your brake pads, you can ensure that they provide the necessary stopping power while maintaining the overall safety of the vehicle. In the following sections, we will outline a step-by-step approach to checking and replacing brake pads, equipping you with the knowledge to perform this essential maintenance task.
Prepare to dive into the details of the inspection process. We will cover the tools required, signs of wear, and the step-by-step replacement procedure. Staying proactive about brake maintenance not only enhances your driving experience but also ensures the safety of you and your passengers on the road.
How to Properly Inspect Brake Pads for Wear and Tear
Inspecting brake pads is an essential task to ensure safe driving and optimal braking performance. Begin by gathering the necessary tools, including a jack, jack stands, and a lug wrench. Make sure the vehicle is parked on a level surface and the ignition is off.
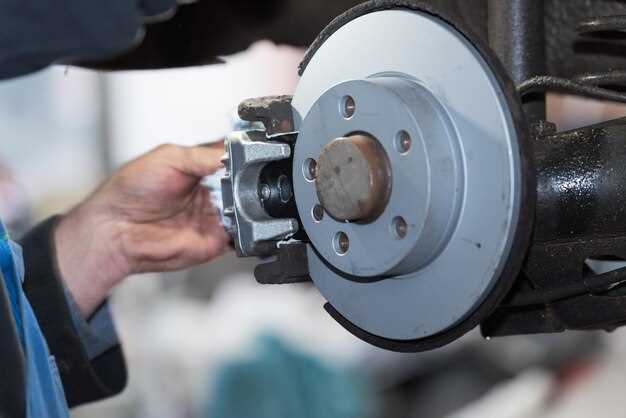
Start the inspection by loosening the lug nuts on the wheel you plan to check, then raise the vehicle with the jack and secure it using jack stands. Remove the wheel to gain access to the brake assembly. Carefully examine the brake pads visible on the caliper. Look for signs of wear, such as thinning material or uneven surfaces.
It’s crucial to check the thickness of the brake pads. Most manufacturers recommend replacing pads when they reach around 3 millimeters of material left. Use a ruler or a brake pad gauge for accurate measurement. Pay attention to any grooves or cracks, as these defects can affect braking efficiency.
As you inspect the brake pads, also look for signs of contamination, such as grease or brake fluid, which can compromise performance. If you notice any foreign substances, further inspection of the caliper and rotor may be necessary.
Additionally, check for any unusual noises or vibrations that may indicate uneven wear on the brake pads. If you observe any of these issues, it’s advisable to replace the pads promptly to maintain vehicle safety.
Lastly, remember to inspect the pad backing plates for rust or corrosion, as this can lead to braking failure over time. Regularly checking your brake pads is vital for ensuring safe and effective braking performance on the road.
Safe Procedures for Replacing Brake Pads on Your Vehicle
Replacing brake pads is a crucial maintenance task that requires careful attention to safety. Before you start, ensure you have the right tools and a clear workspace. Begin by checking the vehicle’s owner manual for any specific instructions related to your make and model.
Always park the vehicle on a flat surface and engage the parking brake. This prevents any unwanted movement during the replacement process. Using wheel chocks, secure the opposite tires to further enhance safety. When you are ready to lift the vehicle, utilize a reliable hydraulic jack and place jack stands under the manufacturer-recommended points for stability.
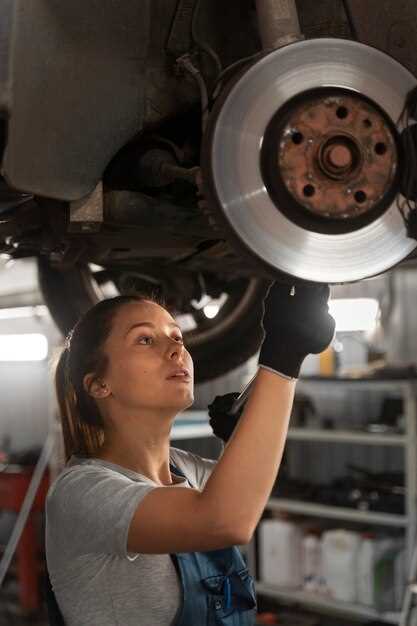
Once the vehicle is elevated and secured, remove the wheel and inspect the brake pads. Check for wear indicators, ensuring that the pads are replaced if they are worn down to the manufacturer’s specifications. While you are inspecting the brake components, also examine the rotors for any scoring or warping, as this may require additional action.
After assessing the brake pads, carefully remove them. Take note of the orientation, as this will assist you in installing the new pads correctly. Before installing the new brake pads, clean the caliper and the area where the pads sit. This ensures that the new pads will make proper contact and function effectively.
Install the new brake pads, aligning them with the caliper bracket. Ensure that they fit snugly and securely. After replacing the pads, reattach the wheel and lower the vehicle cautiously. Before driving, pump the brake pedal a few times to build up pressure in the brake system. This step is vital to ensure the pads are seated properly against the rotors.
Finally, always conduct a safety check by testing the brakes at low speeds in a controlled environment. This helps confirm that the installation was successful and that your vehicle is safe to operate. By following these procedures, you can confidently replace your brake pads while prioritizing safety.
Conducting a Comprehensive Safety Check After Brake Pad Replacement
After replacing the brake pads, it is essential to conduct a thorough safety check to ensure proper functionality and safety. Begin by inspecting the brake pads visually. Ensure they are correctly seated in the caliper and that there are no signs of uneven wear or damage.
Next, examine the brake rotors for any signs of scoring or warping. It is crucial that the surfaces are smooth and free of debris. If necessary, consider resurfacing or replacing the rotors to maintain optimal braking performance.
Check the brake fluid level and inspect the brake lines for leaks. Low fluid levels or any visible leak can indicate a serious issue that needs immediate attention. Ensure that the brake fluid reservoir cap is secure after the inspection.
Perform a test of the braking system by gently pressing the brake pedal. The pedal should feel firm and responsive. If the pedal sinks to the floor or feels spongy, further investigation into the brake system may be required.
If equipped with ABS, test the anti-lock braking system functionality. This can be done by driving at a low speed and applying the brakes firmly. You should feel the system engage without any abnormal noises.
Lastly, conduct a road test to evaluate the overall performance of the brakes. Listen for any unusual noises and monitor the car’s stopping distance to ensure it meets safety standards. If any irregularities occur during this check, revisit the installation process to address potential issues.